Integrating Google Maps with Custom Markers and Clustering in Flutter
Integrating Google Maps into your Flutter app can dramatically enhance the user experience. In this tutorial by RulTech Solutions Private Limited, we’ll show you how to achieve a seamless Flutter Google Maps integration using custom markers and clustering. Whether you’re building a travel app, delivery system, or property locator, Flutter Google Maps integration helps you display location data clearly and professionally.
Google Maps provides a familiar interface that users trust, and by combining it with Flutter, you gain full control over how the map looks and behaves. Flutter’s flexible UI, paired with Google’s powerful mapping tools, makes it possible to design highly interactive and performant apps.
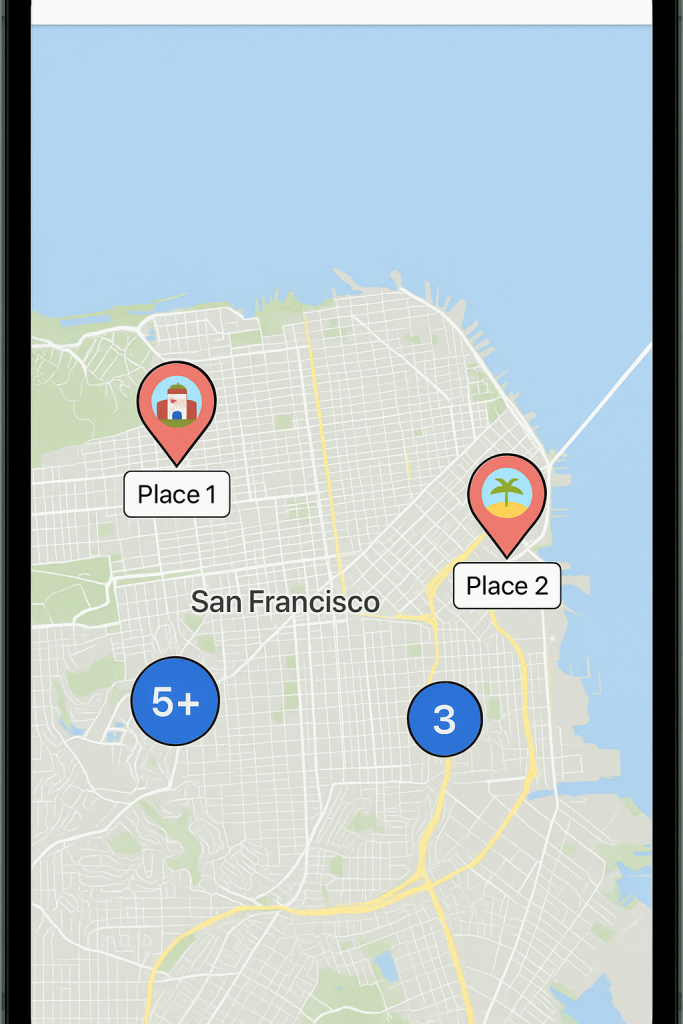
One of the main challenges developers face when displaying many markers is clutter. That’s where marker clustering comes in. Clustering groups nearby markers into a single icon (like “5+”), improving performance and making it easier for users to explore the map. With custom markers, you can represent different types of locations—restaurants, stores, hotels, or any points of interest—with personalized icons that match your brand.
Why Choose Flutter Google Maps Integration?
Using Flutter Google Maps integration allows developers to create responsive, interactive map interfaces that handle large data sets with ease. With custom markers and clustering, your app becomes both functional and user-friendly—perfect for location-based services.
What It Is:
Google Maps Integration lets you embed interactive maps into your Flutter app using google_maps_flutter
Custom Markers replace default pins with personalized icons (e.g., store logos, user avatars)
Clustering groups nearby markers into one icon (e.g., “5+”) to prevent clutter and improve performance, especially at lower zoom levels.
Key Components:
Google Maps API Key – Required from Google Cloud Console.
ClusterManager – Handles grouping and rendering of clustered markers.
Custom Marker Builder – Converts asset images or widgets into marker icons.
Use Cases :
Real estate apps showing nearby properties.
Restaurant or tourism maps with dense locations.
Logistics or delivery tracking interfaces.
Map and Cluster Manager Setup
Set up the main widget with GoogleMap and ClusterManager.
class MapScreen extends StatefulWidget {
  @override
  _MapScreenState createState() => _MapScreenState();
}

class _MapScreenState extends State<MapScreen> {
  late GoogleMapController _mapController;
  late ClusterManager _clusterManager;

  final List<Place> places = [
    Place(name: 'Place 1', latLng: LatLng(37.7749, -122.4194), imageUrl: 'assets/place1.png'),
    Place(name: 'Place 2', latLng: LatLng(37.7849, -122.4094), imageUrl: 'assets/place2.png'),
    // Add more markers
  ];

  Set<Marker> _markers = {};

  @override
  void initState() {
    super.initState();
    _clusterManager = ClusterManager<Place>(
      places,
      _updateMarkers,
      markerBuilder: _markerBuilder,
    );
  }

  void _updateMarkers(Set<Marker> markers) {
    setState(() {
      _markers = markers;
    });
  }

  Future<Marker> _markerBuilder(Cluster<Place> cluster) async {
    return Marker(
      markerId: MarkerId(cluster.getId()),
      position: cluster.location,
      icon: cluster.isMultiple
          ? await BitmapDescriptor.fromAssetImage(ImageConfiguration(size: Size(48, 48)), 'assets/cluster.png')
          : await BitmapDescriptor.fromAssetImage(ImageConfiguration(size: Size(48, 48)), cluster.items.first.imageUrl),
      infoWindow: cluster.isMultiple
          ? InfoWindow(title: '${cluster.count} places')
          : InfoWindow(title: cluster.items.first.name),
    );
  }

  @override
  Widget build(BuildContext context) {
    return Scaffold(
      body: GoogleMap(
        initialCameraPosition: CameraPosition(target: LatLng(37.7749, -122.4194), zoom: 12),
        onMapCreated: (controller) {
          _mapController = controller;
          _clusterManager.setMapId(_mapController.mapId);
        },
        markers: _markers,
        onCameraMove: _clusterManager.onCameraMove,
        onCameraIdle: _clusterManager.updateMap,
      ),
    );
  }
}
Custom Marker Design
Add custom assets in assets/ folder and declare in pubspec.yaml.
flutter:
  assets:
    - assets/place1.png
    - assets/place2.png
    - assets/cluster.png
Platform Configuration
Android (AndroidManifest.xml):
<uses-permission android:name="android.permission.INTERNET"/>
<meta-data
    android:name="com.google.android.geo.API_KEY"
    android:value="YOUR_API_KEY"/>
iOS (AppDelegate.swift):
GMSServices.provideAPIKey("YOUR_API_KEY")Also add in Info.plist:
<key>io.flutter.embedded_views_preview</key>
<true/>
<key>GMSApiKey</key>
<string>YOUR_API_KEY</string>
Example: